
So this is my first post and like in everything, third time is a charmer so next time i hope to have pics for every step on camera. i have here some step by step to do this design on your own nails. i don’t have pictures for all of it but it comes close. If you have questions, which i hope they are covered in this Web Blog, Please ask away or message me:).
*Please note: This takes long!!! i started this at 12 and ended at like 3pmish. It really helps to have a small fan of just a fan in general near by so your polish can dry faster to make this all go by faster.
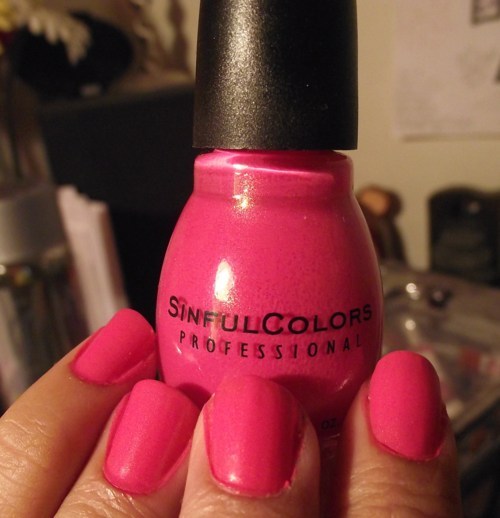
So the first step is picking the colors you desire… remember it doesn’t have to be my colors, they may be any colors you want but please beware this is a long process. I chose my Sinful Colors polish.

From Left to Right: Cream Pink(Pink-Obviously), Happy Ending(Green), Love Nails(Blue), and Let’s Talk(purple)
-Next you create a base coat. i chose the Cream Pink to be my base becase i wanted it to be my top strip.
-Now Let your base color dry. (this is where the fan comes in handy)
-Once your base is dry and get your second color which mine was Let’s Talk (purple), get a piece of tape (make sure to stick tape to you palm to take away some stickyness otherwise you will take some of your base off) remember the base is still fragile to coming off. Take that piece of tape and slant it to how you want it like i did on my picture bellow. and polish that baby!
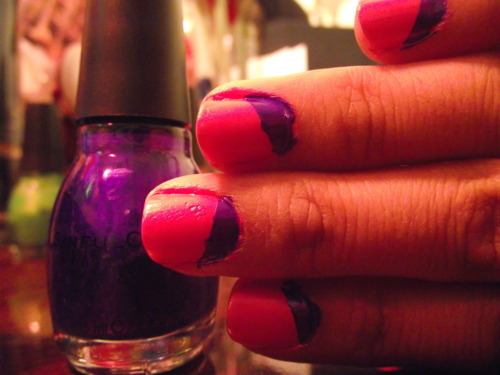
* notice my bottom is a lil messy but it was my first time doing this but no worries it will be covered by your next color:).
-Next your going to need two strips of tape and your third color which is my Love nails (blue) color. like my pic shows ( the only helpful one i took:( sry)
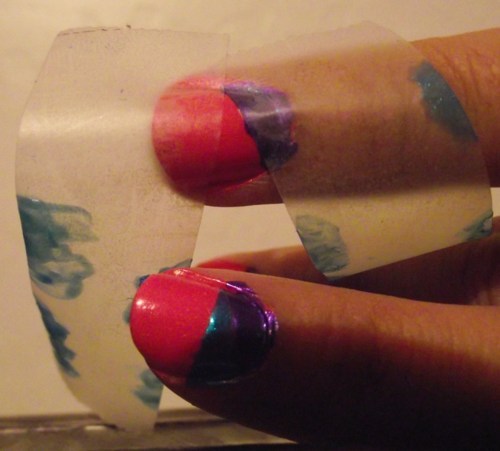
*please remember to stick the tapes on your palm first to take off some stickyness. specially so you wont mess it up. the fan helps to make the polish dry faster.
they should end up looking something like this:)
*some are messy but no worries with time it gets better. once you get used to taping and all that you will be a pro:)
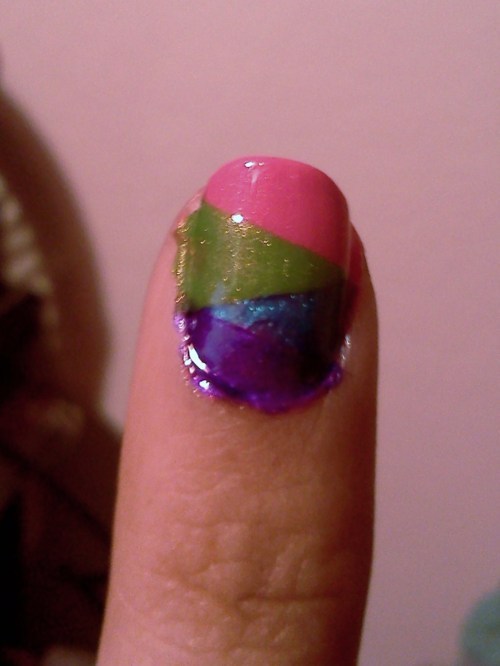
-Nest is you being so close to the finish line!!! use the same technique as you used for your third color (or my blue) and do it for your Fourth color which mine was the green or sinful color’s Happy ending:). and it should look a lil like this!
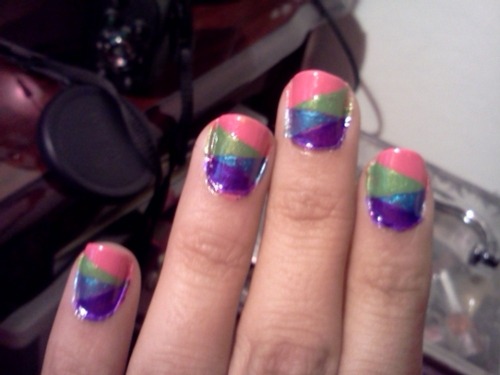
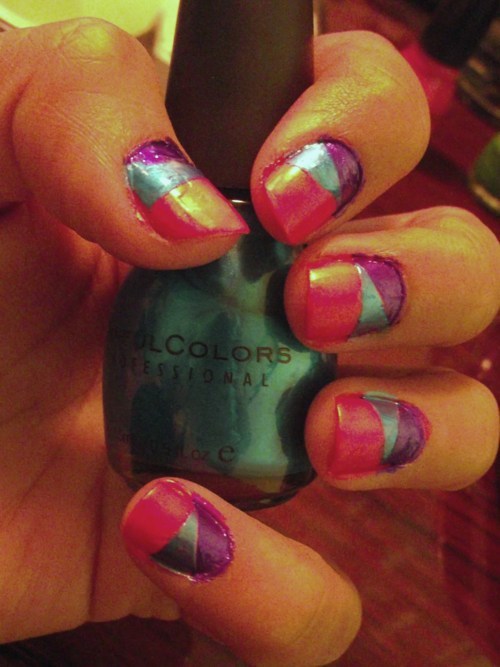
-THATS IT!! you made it! the easy part now is putting a top coat of a clear polish which i didn’t have a pick of but it was a wet n wild one. but once you add the top coat you have your beautiful nails that look like this…

*Some tips:
-This does Take a long time
-Its good to get crappy tap from a dollar store becuase its less sticky and it will be easier to apply but still stick it on your palm first.
-FAN FAN FAN FAN—very long process but it helps to make it go faster.
-after you shower or wash your nails the polish you got on your skin will come off when you scratch it off.
Thank you for reading i hope it helps. everyone loved my nails when they saw them so i hope everyone will love yours as well:) please message me if you have questions:)
Products Uses:
- -Sinful Colors nails polish
- Cream Pink, Happy Ending, Let’s Talk, and Love Nails
- -Wet n’ Wild Clear polish
- -Some cheap tape i found haha.
Can find these at http://www.walgreens.com/store/c/sinful-colors-professional-nail-enamel/ID=prod1550389-product
No comments:
Post a Comment